RNA quality:
The RNA quality could be checked by:
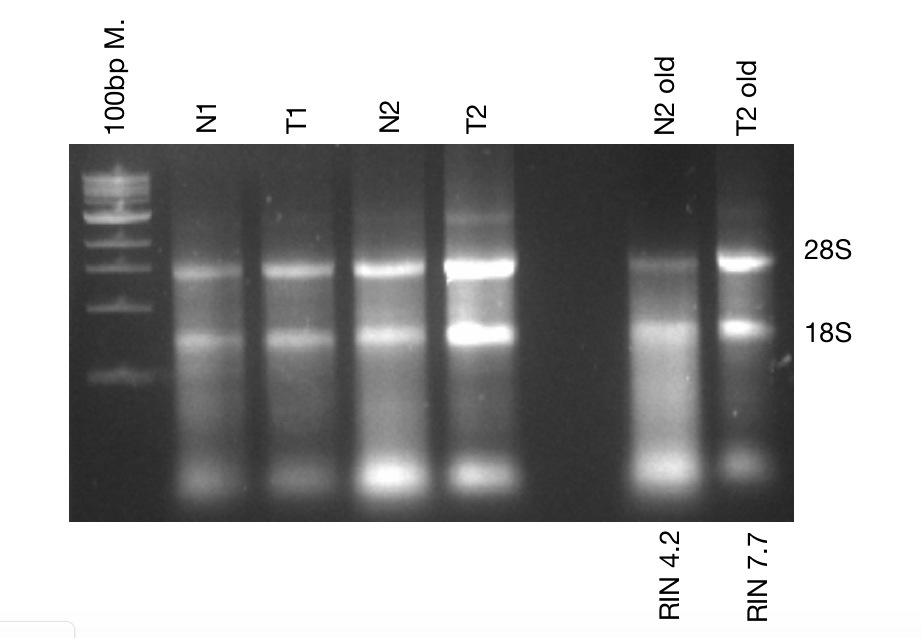
1- Agarose gel electrophoresis: Old and new RNA were checked using the 1.2% agarose gel in 1X TBE buffer , running at 70 V for 15-30 min.
 .
.
2- Qubit 4:
We have the instrument in the lab.
- Home>> reagent calculator
- Number of samples +standards+1>>>> working solution(1:200 Dye+buffer), 2 different dyes :one attached to long RNAs and one to small degraded RNAs
for example: 6 samples+2 standards >>9 reactions >>(9 ul dye +1791ul buffer) >> 9* 200 ul working solution
- Add 10ul of standard/ sample to 190ul of working solution>>mix 2 min, stable for 3hours
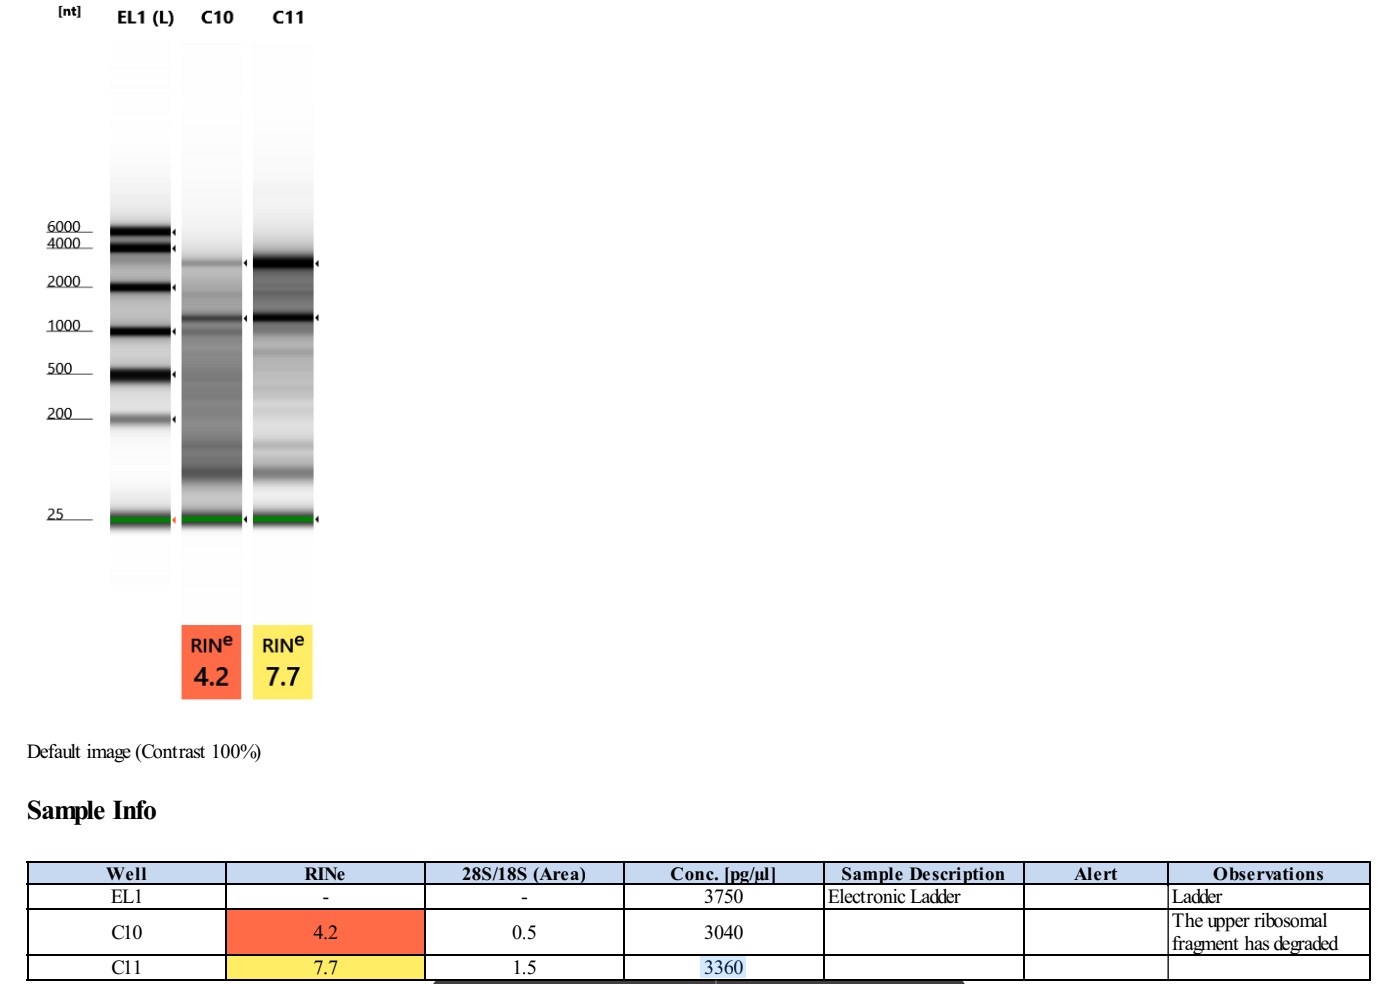
3- Tape station, HS RNA (with electronic ladder):
1. Allow reagents (High Sensitivity RNA sample buffer and ScreenTape) to equilibrate at RT for 30 minutes.
2. Vortex and spin down the reagents before use.
3. Thaw total RNA samples on ice and have a heating block ready at 72°C.
4. Mix the RNA sample(s) by vortexing and then short spin to collect all the sample on the bottom and store them on ice.
5. If necessary dilute the samples to a concentration of 0,5 ng/μl - 10ng/μl. (N2 old: 4ng/ul, T2 old:5ng/ul)
6. Prepare sample(s) by mixing 1 μl High Sensitivity RNA Sample Buffer with 2 μl RNA sample in the same tube strip or 96-well plate. NOTE: First add the sample buffer by reverse pipetting. Then add the RNA sample by forward pipetting and mix briefly by pipetting. Do this on ice.
7. Spin down, then vortex using IKA MS3 vortexer at 2000 rpm for 1 minute.
8. Spin down to position the sample at the bottom of the tube/well.
9. Heat the samples at 72°C for 3 minutes.
10. Place the samples directly on ice for 2 minutes.
11. Spin down to position the sample at the bottom of the tube/well.
12. Load the sample(s) into the TapeStation instrument. Make sure there is no seal on the 96-well plate, no cap(s) on the tube strip(s), and no lid on the tip box.
13. Select the required sample(s) on the TapeStation Controller Software. And select electronic ladder by right-clicking on well A1 of the tube strip.
14. Load the Screen Tape device into the TapeStation instrument. CAUTION: Ensure that the ScreenTape device is flicked before inserting it into the instrument. If there are any small bubbles present at the gel/buffer interface.
15. Check if there are enough loading tips available.
16. Click “Start”.
17. Unload consumables after completion.
Analyzing results The TapeStation Analysis Software will automatically start and save the data when a run is completed. The saved files can be found at: ThisPC/Documents/ Agilent/TapeStationData. With the TapeStation Analysis Software the results can be saved as PDF by going to ‘File’ and clicking the ‘Creat Report’ tab. Click ‘Save As...’ to save the file to the desired location.
Store reagent vials and the ScreenTape device at 2 - 8 °C. If you run less than 16 lanes, store used ScreenTape upright at 2 - 8 °C, write on the ScreenTape packaging the date of opening and how many lanes were used. Store the ladder mix (ladder + sample buffer) in the dark at 2 - 8 °C and write the name (HS D5000 /D5000 / D1000 / etc.) and date on the 8-well strip. CAUTION: Never freeze the ScreenTape device or reagent vials. Freezing the ScreenTape
 .
.